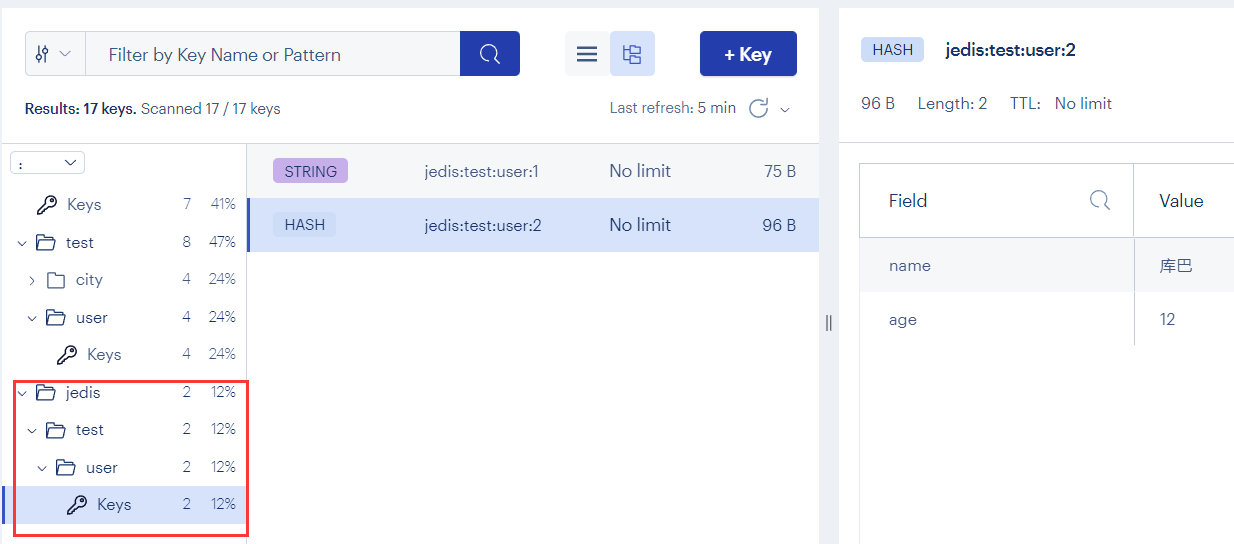
参考黑马的redis入门到实战视频,记录一些知识点
视频在b站 -> 传送门
一、基础
1. redis特征
- 键值(key-value)型,value支持多种不同数据类型,功能丰富
- 单线程,每个命令具备原子性
- 低延迟,速度快(基于内存、IO多路复用、良好的编码)
- 支持数据持久化
- 支持主从集群、分片集群
2. redis的常用指令
2.1 通用指令
通过help [command] 可以查看一个命令的具体用法:

2.2 String相关指令
- SET:添加或者修改已经存在的一个String类型的键值对
- GET:根据key获取String类型的value
- MSET:批量添加多个String类型的键值对
- MGET:根据多个key获取多个String类型的value
- INCR:让一个整型的key自增1
- INCRBY:让一个整型的key自增并指定步长,例如:incrby num 2 让num值自增2
- INCRBYFLOAT:让一个浮点类型的数字自增并指定步长
- SETNX:添加一个String类型的键值对,前提是这个key不存在,否则不执行
- SETEX:添加一个String类型的键值对,并且指定有效期
对于自增指令,字符串必须符合int或者float的形式
redis中的key允许有层级结构,可以通过:隔开,如下图所示:

2.4 Hash常见指令
- HSET key field value:添加或者修改hash类型key的field的值
- HGET key field:获取一个hash类型key的field的值
- HMSET:批量添加多个hash类型key的field的值
- HMGET:批量获取多个hash类型key的field的值
- HGETALL:获取一个hash类型的key中的所有的field和value
- HKEYS:获取一个hash类型的key中的所有的field
- HVALS:获取一个hash类型的key中的所有的value
- HINCRBY:让一个hash类型key的字段值自增并指定步长
- HSETNX:添加一个hash类型的key的field值,前提是这个field不存在,否则不执行
例如:

2.5 List常见指令
redis的list与Java中的LinkedList类似,可以看成一个双向链表。
- LPUSH key element … :向列表左侧插入一个或多个元素
- LPOP key:移除并返回列表左侧的第一个元素,没有则返回nil
- RPUSH key element … :向列表右侧插入一个或多个元素
- RPOP key:移除并返回列表右侧的第一个元素
- LRANGE key star end:返回一段角标范围内的所有元素
- BLPOP和BRPOP:与LPOP和RPOP类似,只不过在没有元素时等待指定时间,而不是直接返回nil

2.6 Set常见指令
- SADD key member … :向set中添加一个或多个元素
- SREM key member … : 移除set中的指定元素
- SCARD key: 返回set中元素的个数
- SISMEMBER key member:判断一个元素是否存在于set中
- SMEMBERS:获取set中的所有元素
- SINTER key1 key2 … :求key1与key2的交集
- SDIFF key1 key2 … :求key1与key2的差集
- SUNION key1 key2 …:求key1和key2的并集
2.7 SortedSet
Redis的SortedSet是一个可排序的set集合,与Java中的TreeSet有些类似,但底层数据结构却差别很大。SortedSet中的每一个元素都带有一个score属性,可以基于score属性对元素排序,底层的实现是一个跳表(SkipList)加 hash表。
特性:可排序、元素不重复、查询速度快
一般用于实现排行榜的功能。
常见指令:
- ZADD key score member:添加一个或多个元素到sorted set ,如果已经存在则更新其score值
- ZREM key member:删除sorted set中的一个指定元素
- ZSCORE key member : 获取sorted set中的指定元素的score值
- ZRANK key member:获取sorted set 中的指定元素的排名
- ZCARD key:获取sorted set中的元素个数
- ZCOUNT key min max:统计score值在给定范围内的所有元素的个数
- ZINCRBY key increment member:让sorted set中的指定元素自增,步长为指定的increment值
- ZRANGE key min max:按照score排序后,获取指定排名范围内的元素
- ZRANGEBYSCORE key min max:按照score排序后,获取指定score范围内的元素
- ZDIFF、ZINTER、ZUNION:求差集、交集、并集
注意:所有的排名默认都是升序,如果要降序则在命令的Z后面添加REV即可
3. Jedis
以redis命令作为方法名称,线程不安全,多线程情况下需要基于连接池来使用。
3.1 demo
首先配置坐标:
1
2
3
4
5
| <dependency>
<groupId>redis.clients</groupId>
<artifactId>jedis</artifactId>
<version>4.2.3</version>
</dependency>
|
直接写一个测试类,来调用:
1
2
3
4
5
6
7
8
9
10
11
12
13
14
15
16
17
18
19
20
21
22
23
24
25
26
27
28
29
30
31
32
33
34
35
36
37
38
39
40
41
42
43
44
45
46
47
48
49
50
| package com.lucky.test;
import org.junit.jupiter.api.AfterEach;
import org.junit.jupiter.api.BeforeEach;
import org.junit.jupiter.api.Test;
import redis.clients.jedis.Jedis;
import java.util.Map;
public class JedisTest {
private Jedis jedis;
@BeforeEach
void setUp() {
jedis = new Jedis("192.168.153.6", 6379);
jedis.auth("123456");
jedis.select(0);
}
@Test
void testString() {
String res = jedis.set("jedis:test:user:1", "马里奥");
System.out.println(res);
System.out.println(jedis.get("jedis:test:user:1"));
}
@Test
void testHash() {
jedis.hset("jedis:test:user:2", "name", "库巴");
jedis.hset("jedis:test:user:2", "age", "12");
Map<String, String> map = jedis.hgetAll("jedis:test:user:2");
System.out.println(map);
}
@AfterEach
void tearDown() {
if (jedis != null) {
jedis.close();
}
}
}
|

3.2 jedis的连接池
1
2
3
4
5
6
7
8
9
10
11
12
13
14
15
16
17
18
19
20
21
22
23
24
25
26
| package com.lucky.jedis.util;
import redis.clients.jedis.Jedis;
import redis.clients.jedis.JedisPool;
import redis.clients.jedis.JedisPoolConfig;
public class JedisConnectionFactory {
private static final JedisPool jedisPool;
static {
JedisPoolConfig poolConfig = new JedisPoolConfig();
poolConfig.setMaxTotal(8);
poolConfig.setMaxIdle(8);
poolConfig.setMinIdle(0);
poolConfig.setMaxWaitMillis(1000);
jedisPool = new JedisPool(poolConfig,
"192.168.153.6", 6379, 1000, "123456");
}
public static Jedis getJedis() {
return jedisPool.getResource();
}
}
|
使用的时候:
1
| jedis = JedisConnectionFactory.getJedis();
|
4. SpringDataRedis
直接看demo吧
首先加依赖:
1
2
3
4
5
6
7
8
9
10
|
<dependency>
<groupId>org.springframework.boot</groupId>
<artifactId>spring-boot-starter-data-redis</artifactId>
</dependency>
<dependency>
<groupId>org.apache.commons</groupId>
<artifactId>commons-pool2</artifactId>
</dependency>
|
然后写配置,这里用的yml:
1
2
3
4
5
6
7
8
9
10
11
| spring:
redis:
host: 192.168.153.6
port: 6379
password: 123456
lettuce:
pool:
max-active: 8
max-idle: 8
min-idle: 0
max-wait: 100
|
然后写测试类:
注意在测试前修改了redisTemplate的序列化策略。它默认使用的是JDK的序列化策略,因此在添加数据时会出现乱码。因此这里将RedisTemplate的序列化策略修改为String的序列化策略。
1
2
3
4
5
6
7
8
9
10
11
12
13
14
15
16
17
18
19
20
21
22
23
24
25
26
27
28
29
30
31
| package com.lucky7;
import com.lucky7.redis.config.redis.pojo.User;
import lombok.NoArgsConstructor;
import org.junit.jupiter.api.BeforeEach;
import org.junit.jupiter.api.Test;
import org.springframework.beans.factory.annotation.Autowired;
import org.springframework.boot.test.context.SpringBootTest;
import org.springframework.data.redis.core.RedisTemplate;
@SpringBootTest
class SpringRedisDemoApplicationTests {
@Autowired
private RedisTemplate<String, Object> redisTemplate;
@Test
void testString() {
redisTemplate.opsForValue().set("name", "牜牜");
Object name = redisTemplate.opsForValue().get("name");
System.out.println(name);
}
@Test
void testSaveUser() {
redisTemplate.opsForValue().set("user2", new User("路易", 18));
User user2 = (User) redisTemplate.opsForValue().get("user2");
System.out.println("user: " + user2);
}
}
|
RedisTemplate配置类:
这里我们配置key使用string序列化,value使用JSON序列化。
1
2
3
4
5
6
7
8
9
10
11
12
13
14
15
16
17
18
19
20
21
22
23
24
25
26
27
28
29
30
31
| package com.lucky7.redis.config.redis.config;
import org.springframework.context.annotation.Bean;
import org.springframework.context.annotation.Configuration;
import org.springframework.data.redis.connection.RedisConnectionFactory;
import org.springframework.data.redis.core.RedisTemplate;
import org.springframework.data.redis.serializer.GenericJackson2JsonRedisSerializer;
import org.springframework.data.redis.serializer.RedisSerializer;
@Configuration
public class RedisConfig {
@Bean
public RedisTemplate<String, Object> redisTemplate(RedisConnectionFactory connectionFactory) {
RedisTemplate<String, Object> template = new RedisTemplate<>();
template.setConnectionFactory(connectionFactory);
GenericJackson2JsonRedisSerializer genericJackson2JsonRedisSerializer = new GenericJackson2JsonRedisSerializer();
template.setKeySerializer(RedisSerializer.string());
template.setHashKeySerializer(RedisSerializer.string());
template.setValueSerializer(genericJackson2JsonRedisSerializer);
template.setHashValueSerializer(genericJackson2JsonRedisSerializer);
return template;
}
}
|
结果:

我们看到写入JSON的同时,写入了class属性,因此反序列化时可以将value转化成USER对象。
缺点是占用空间变多,方案是value也采用string序列化策略。
Spring默认提供了StringRedisTemplate类,可以直接用:
1
2
3
4
5
6
7
8
9
10
11
12
13
14
15
16
17
18
19
20
21
22
23
24
25
26
27
28
29
30
31
32
| package com.lucky7;
import com.fasterxml.jackson.core.JsonProcessingException;
import com.fasterxml.jackson.databind.ObjectMapper;
import com.lucky7.redis.config.redis.pojo.User;
import lombok.NoArgsConstructor;
import org.junit.jupiter.api.BeforeEach;
import org.junit.jupiter.api.Test;
import org.springframework.beans.factory.annotation.Autowired;
import org.springframework.boot.test.context.SpringBootTest;
import org.springframework.data.redis.core.RedisTemplate;
import org.springframework.data.redis.core.StringRedisTemplate;
@SpringBootTest
class SpringRedisDemoApplicationTests {
private static final ObjectMapper mapper = new ObjectMapper();
@Autowired
private StringRedisTemplate stringRedisTemplate;
@Test
void testStringTemplate() throws JsonProcessingException {
User user = new User("鸣人", 88);
String jsonObj = mapper.writeValueAsString(user);
stringRedisTemplate.opsForValue().set("user3", jsonObj);
String val = stringRedisTemplate.opsForValue().get("user3");
User user1 = mapper.readValue(val, User.class);
System.out.println("user = " + user1);
}
}
|
补充乱码原因:
1、redis默认序列化器:JdkSerializationRedisSerializer
2、redis默认序列化器底层使用ByteArrayOutputStream流对key进行序列化操作
3、序列化key的过程中ByteArrayOutputStream转为ObjectOutputStream
4、ObjectOutputStream构造方法中将传入的输出流做了一个writeStreamHeader()操作,writeStreamHeader()调用Bits.putShort方法修改了流中原本为空的byte数组中的几位字节,导致原本为空的流有值
参考链接:https://blog.csdn.net/qq_44872787/article/details/122562595


